Save
Save Last summer, I was packing for a hiking trip and realized I'd forgotten to grab snacks at the store. Standing in my kitchen at 6 AM with nothing but pantry staples, I threw together these no-bake bars on impulse, and they turned out to be the MVP of that whole weekend—chewy, satisfying, and way better than anything store-bought. Now I make them constantly, and they've become my answer to every "What should I bring?" question.
I brought these to a potluck a few months back, and watching people reach for a second one before they'd even finished the first felt like the sweetest small victory. Someone even asked for the recipe on their way out, which doesn't happen often with my cooking.
Ingredients
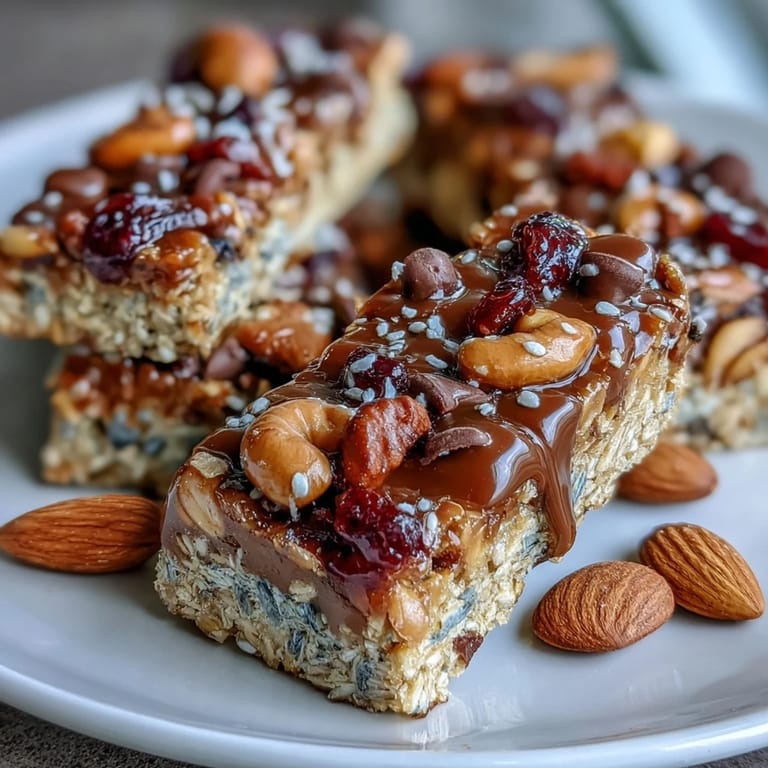
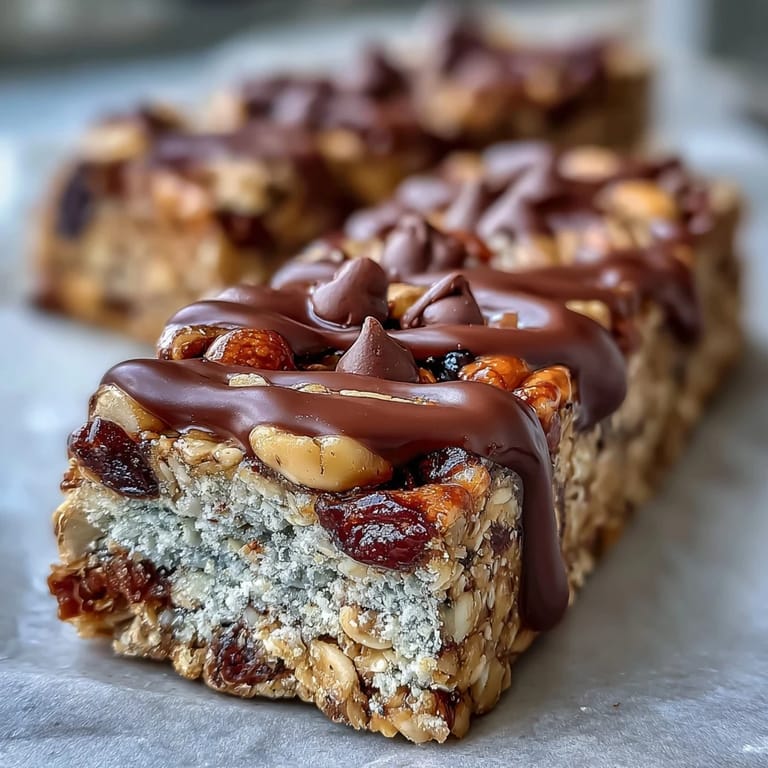
- Old-fashioned rolled oats (2 cups): These give the bars their chewy foundation and are non-negotiable—instant oats will make them mushy and sad.
- Crisp rice cereal (1 cup): This adds a subtle crunch and lightness that balances the density of the oats.
- Mixed nuts (1/2 cup, chopped): Use whatever you have on hand, but the mix of almonds, walnuts, and pecans keeps things interesting.
- Dried fruit (1/2 cup): Cranberries give a slight tang, raisins add sweetness, and chopped apricots bring a soft chewiness.
- Unsweetened shredded coconut (1/4 cup, optional): If you skip this, the bars are still amazing—I only add it when I'm feeling tropical.
- Salt (1/4 teaspoon): Just a pinch to make everything taste more like itself.
- Honey or maple syrup (1/2 cup): This is the glue that holds everything together, and both work beautifully—honey gives a milder sweetness, maple adds depth.
- Creamy peanut butter or almond butter (1/3 cup): The richness here is essential, so don't skimp or go for the chunky stuff.
- Vanilla extract (1 teaspoon): A small amount that makes people ask what smells so good.
- Mini chocolate chips (1/4 cup, optional): Add these at the very end if you want them, or skip them entirely for a less sweet version.
- Chia seeds or flaxseed meal (1 tablespoon, optional): A quiet nutritional boost that no one needs to know about.
Tired of Takeout? 🥡
Get 10 meals you can make faster than delivery arrives. Seriously.
One email. No spam. Unsubscribe anytime.
Instructions
- Get Your Pan Ready:
- Line your 8-inch square baking pan with parchment paper and leave some hanging over the edges—this is your golden ticket to lifting the bars out without them breaking apart or sticking.
- Mix the Dry Team:
- Toss the oats, rice cereal, chopped nuts, dried fruit, coconut (if using), and salt into a large bowl and stir it all together so everything is evenly distributed. This step matters because you don't want pockets of just nuts or just fruit.
- Warm Up the Glue:
- In a small saucepan over low heat, combine the honey and peanut butter, stirring gently until it's smooth and melted—this takes about 2 to 3 minutes and the kitchen will smell incredible. Once it looks like a unified mixture, pull it off the heat and stir in the vanilla.
- Bring It Together:
- Pour that warm, golden mixture over your dry ingredients and mix like you mean it, making sure every oat and nut gets coated. If you're adding chocolate chips, let the mixture cool for a couple minutes first or you'll end up with chocolate soup instead of actual pieces.
- Press and Set:
- Transfer everything into your parchment-lined pan and press it down firmly and evenly with a spatula or the back of a measuring cup—don't be shy here, a good compression keeps the bars from crumbling later. If you want extra texture on top, sprinkle more chocolate chips or nuts and press them in gently.
- Chill and Cut:
- Pop the whole thing in the refrigerator for at least an hour, or until it feels set and no longer squishy. Once it's firm, lift it out using the parchment overhang and cut into 12 bars with a sharp knife, wiping the blade between cuts for clean edges.
 Save
Save My neighbor stopped by while I was packing these into little bags, and before I knew it, she was asking if I'd make them for her book club next month. It's funny how something this simple can become a small tradition between people.
Storage and Keeping Them Fresh
These bars live happily in an airtight container in the refrigerator for up to a week, though they'll probably be gone before then. I keep mine in a glass container with parchment between each layer so they don't stick together, and they travel beautifully in a picnic basket or backpack without falling apart.
Playing With Flavors
Once you nail the basic formula, these bars become your playground. A pinch of cinnamon or cardamom transforms them into something almost spiced-cake-like, while a swap of peanut butter for sunflower seed butter opens them up to anyone with nut allergies. I've even experimented with adding a splash of maple extract or a handful of pumpkin seeds, and honestly, nothing has failed yet.
Custom Combinations That Actually Work
The beauty of these bars is that you're not locked into one version—think of the base recipe as a template rather than a strict rule. I've made a coconut-mango version, a chai-spiced version, and even a dark chocolate and cherry version that felt almost fancy enough for dessert. The magic happens when you pair flavors that naturally belong together and don't overthink it.
- Swap dried fruit combinations freely—blueberries with lemon zest, figs with a touch of orange, or even chopped dates for creamier sweetness.
- Toast your nuts lightly before chopping to deepen their flavor and make the bars taste more intentional.
- Keep a container of these on hand because they're the perfect answer to that 3 PM slump or when you need something that feels like a treat but isn't.
 Save
Save These bars taught me that some of the best snacks don't need a recipe blog with a 10-paragraph introduction—they just need good ingredients and 20 minutes of your time. Make them once and they'll become something you reach for again and again.
Recipe FAQs
- → How do I keep the bars chewy and not hard?
Use the right balance of sticky sweeteners like honey or maple syrup and creamy nut butter to bind ingredients without baking. Chilling helps set them while preserving chewiness.
- → Can I replace nuts to avoid allergies?
Yes, substitute nut butters with sunflower seed butter and omit tree nuts to make a nut-free version while retaining texture and flavor.
- → What’s the best way to store these bars?
Store bars in an airtight container in the refrigerator for up to one week to keep them fresh and firm.
- → Can I add chocolate or seeds to the bars?
Yes, mini chocolate chips or chia and flax seeds can be mixed in for extra taste and nutrition. Add chocolate chips after letting the mix cool slightly to avoid melting.
- → Are these bars suitable for vegan diets?
To make vegan-friendly bars, use maple syrup instead of honey and dairy-free chocolate chips if adding chocolate.
- → How long does preparation take?
Preparation takes about 15 minutes, with no cooking time. Chilling for at least an hour is required to set the bars properly.